Here’s a project write-up by our member Jeffrey Roe, who recently built a Slow Scan TV (SSTV) demo using a Raspberry Pi Pico. He showed it off during the IRTS AGM weekend and radio rally—blending hardware, software, and radio in true hacker fashion.
For the IRTS AGM weekend and radio rally, I wanted to put together a fun little demo to show off something radio-related that combines both hardware and software tinkering. The result? A working SSTV (Slow Scan Television) transmission system using a Raspberry Pi Pico. The aim was to send images over audio and decode them via amateur radio equipment—or in this case, a phone and an oscilloscope during testing.
Like all great projects, this one started with the classic struggle: trying to avoid soldering… and thinking it would only take an hour. How wrong I was!
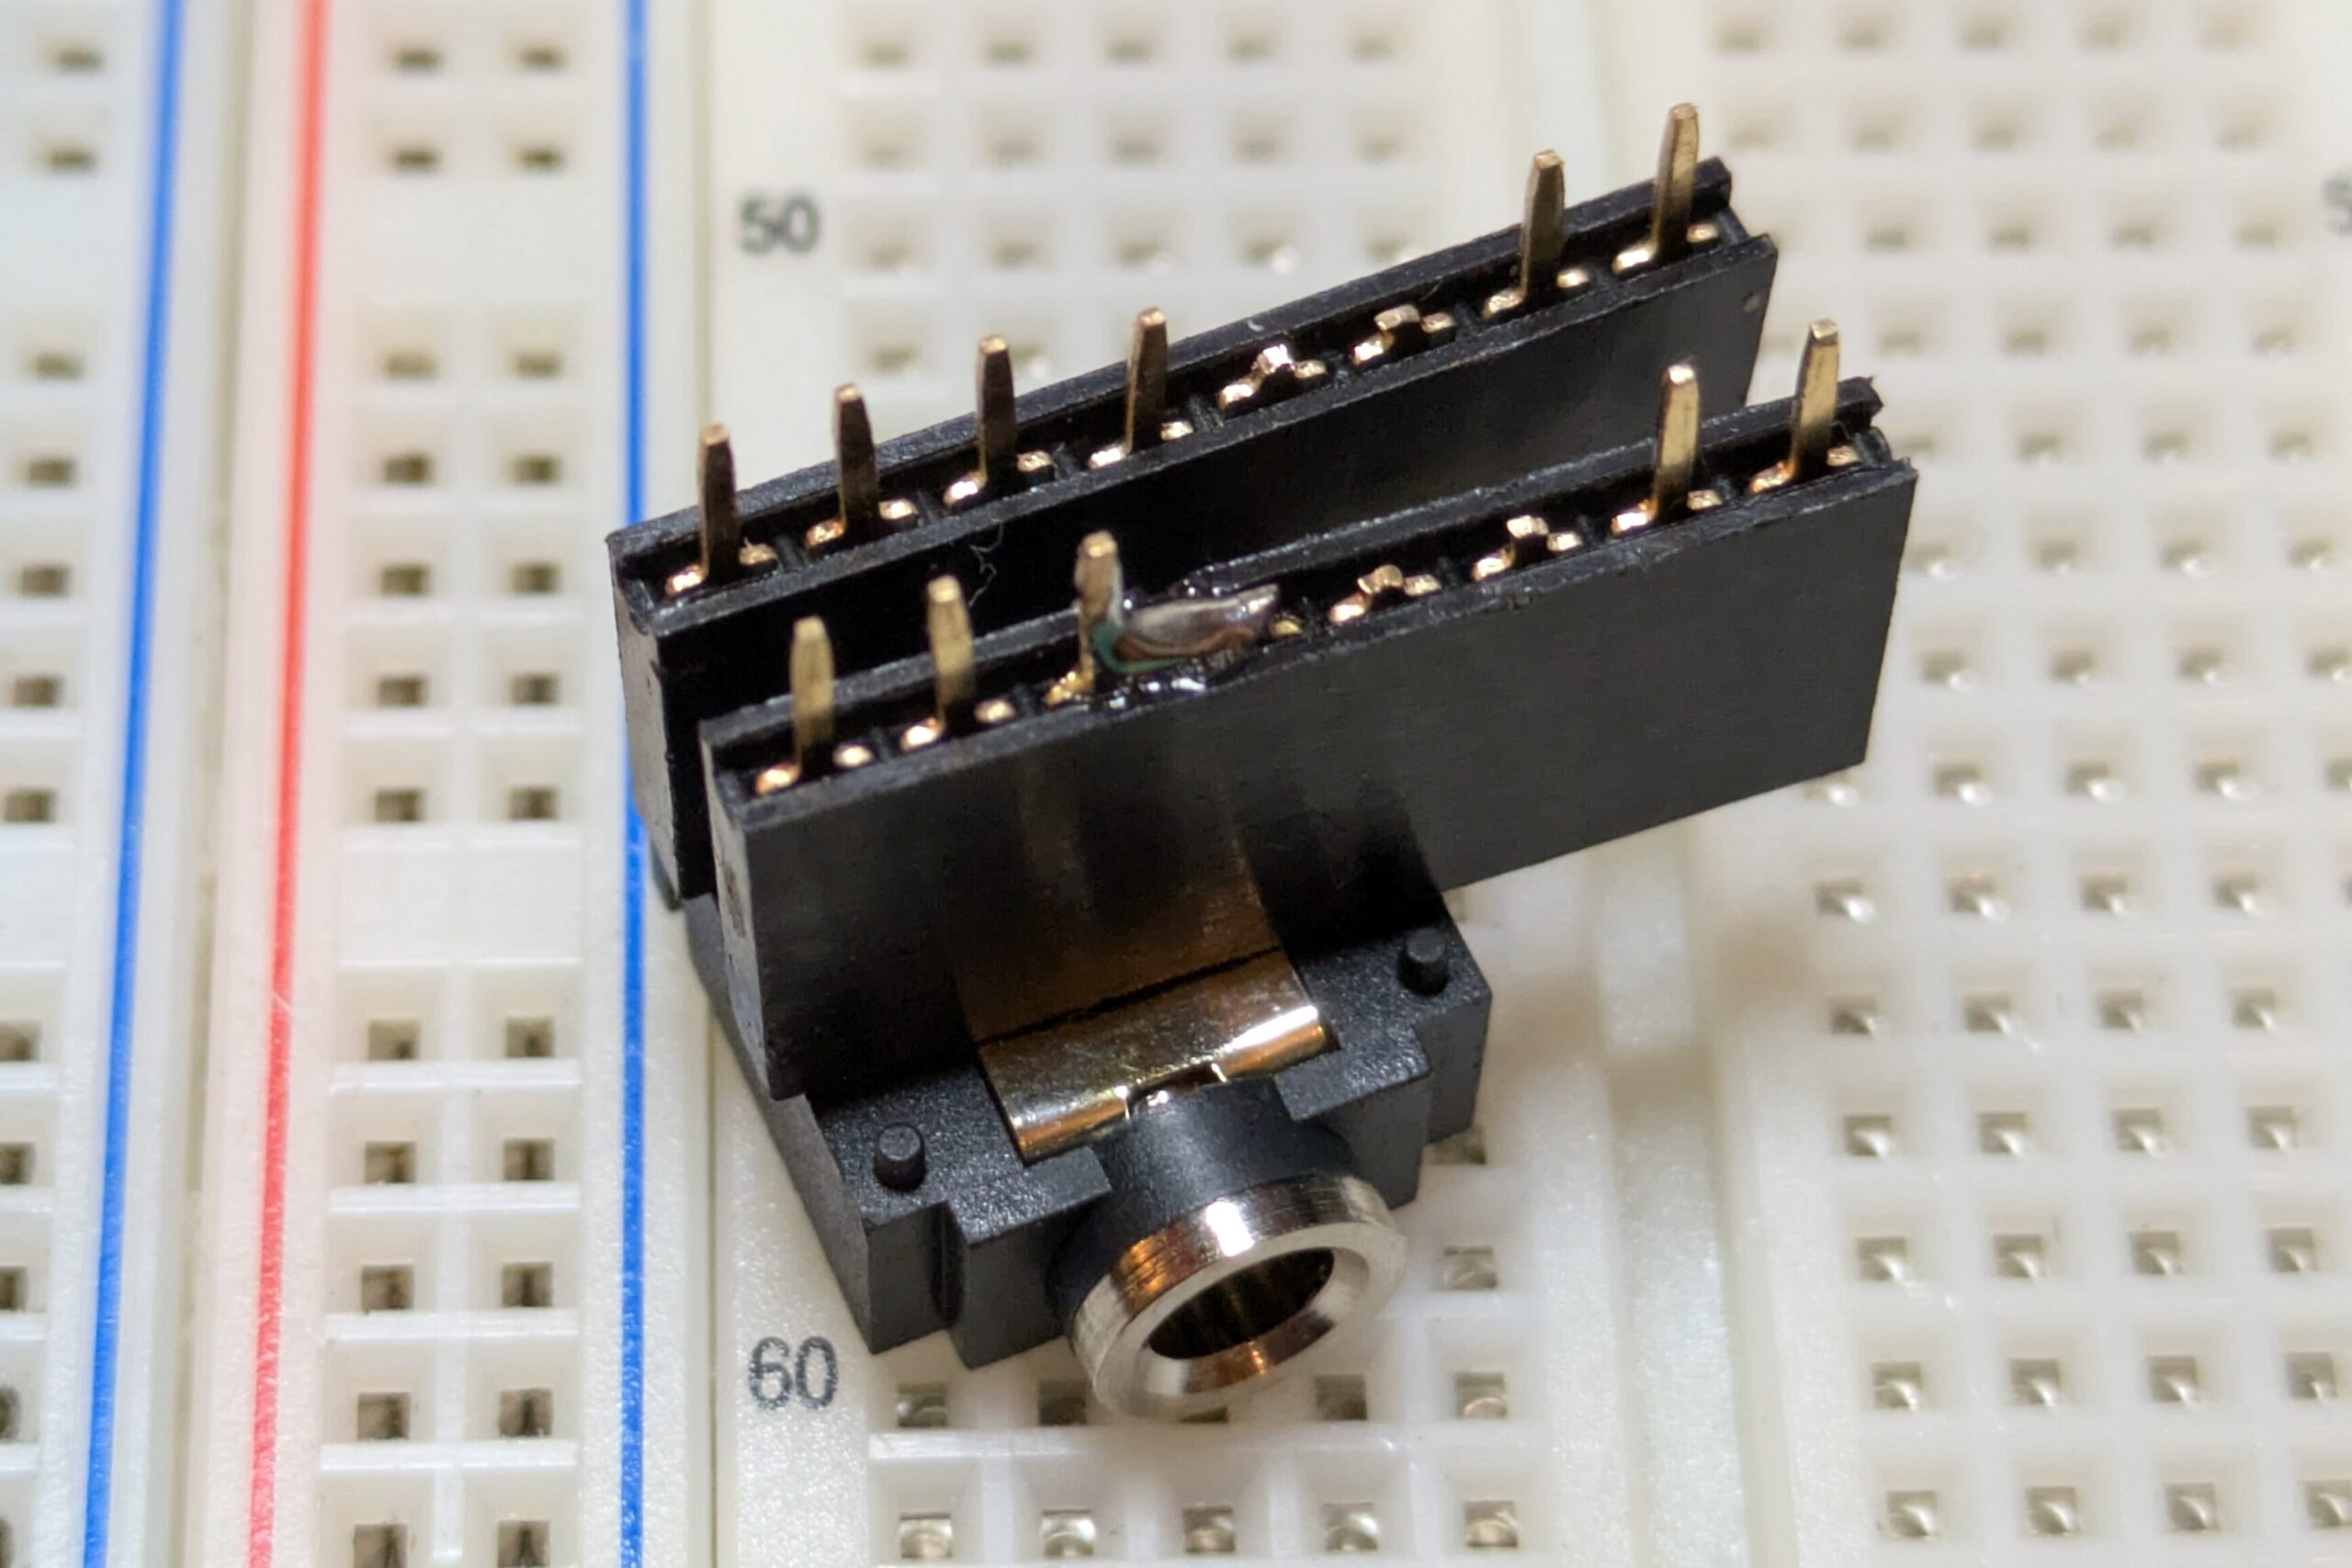
Eventually, I gave in and soldered up a 3.5 mm audio jack breakout to plug into the breadboard cleanly. From there, things started to fall into place. I used a universal PCB with header pins and cut it to a smaller size.
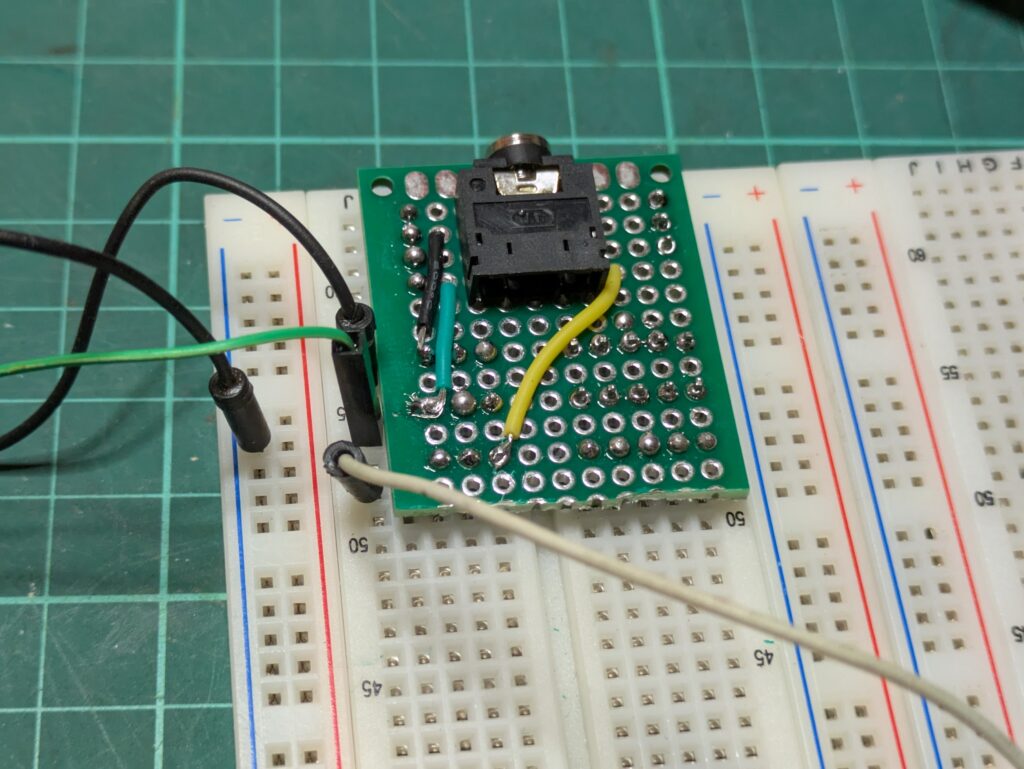
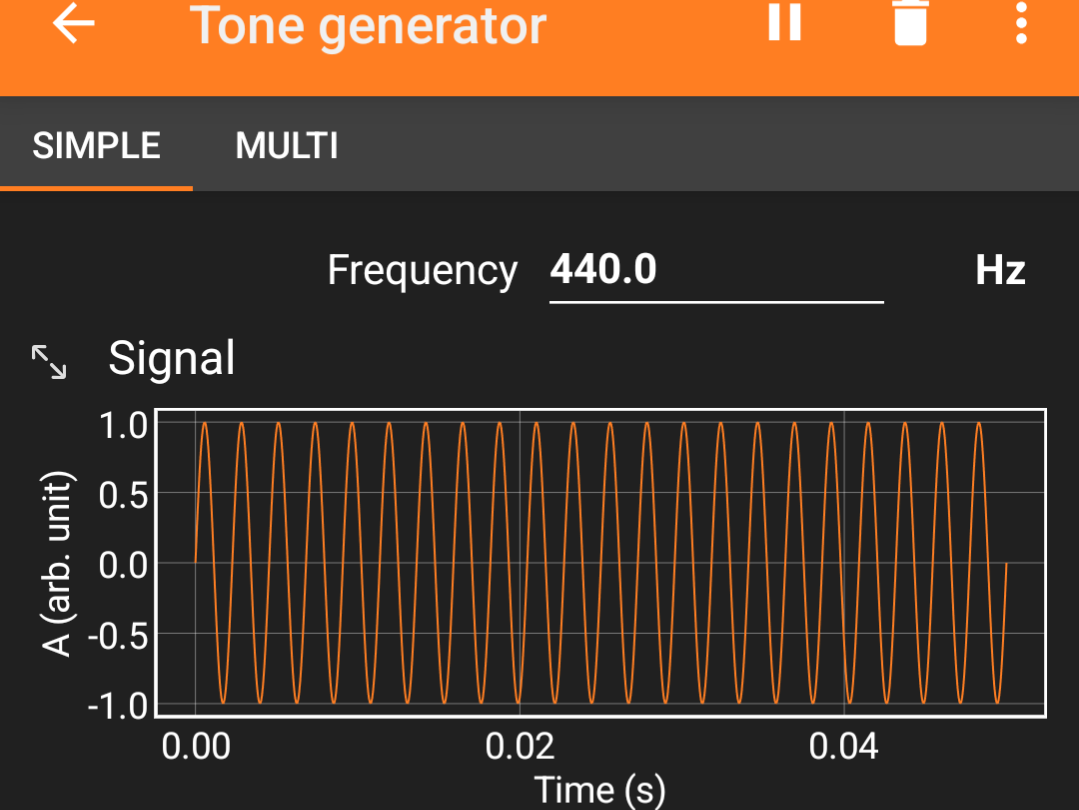
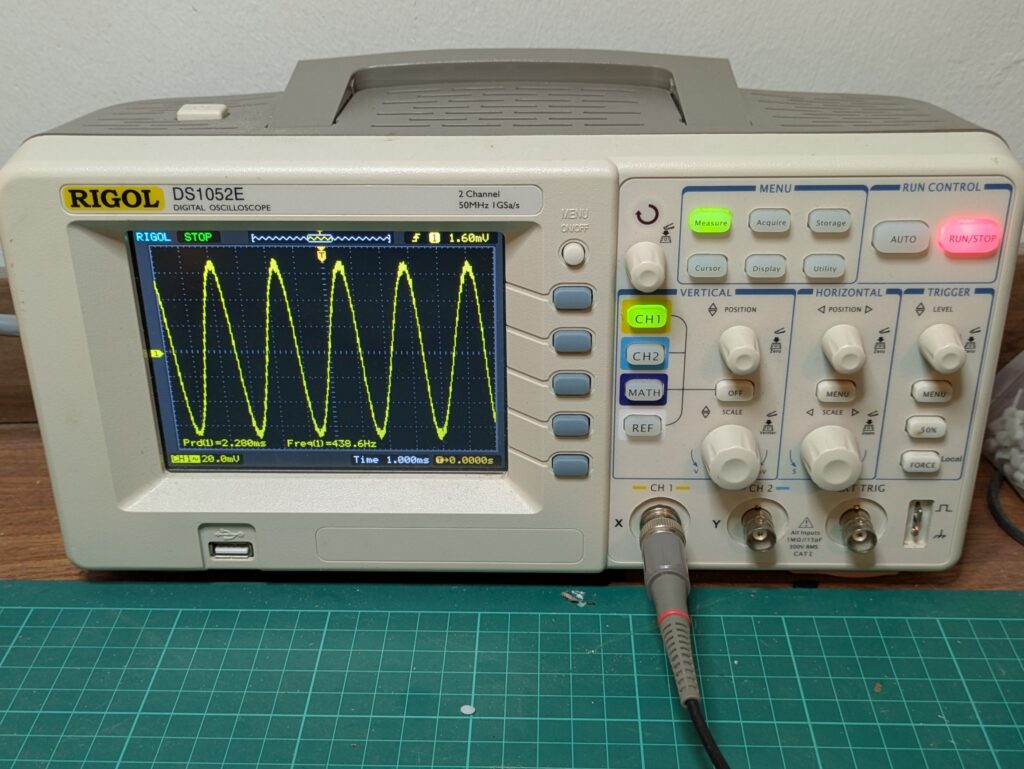
With the jack connected and audio output sorted, it was time for some proper testing. I had an app on my phone I’d always thought might come in handy one day—and it finally did! Phyphox is like a mini lab on your phone. It can generate audio waveforms, which are perfect for our use case here. I used it to generate tones and verified the signal with an oscilloscope.
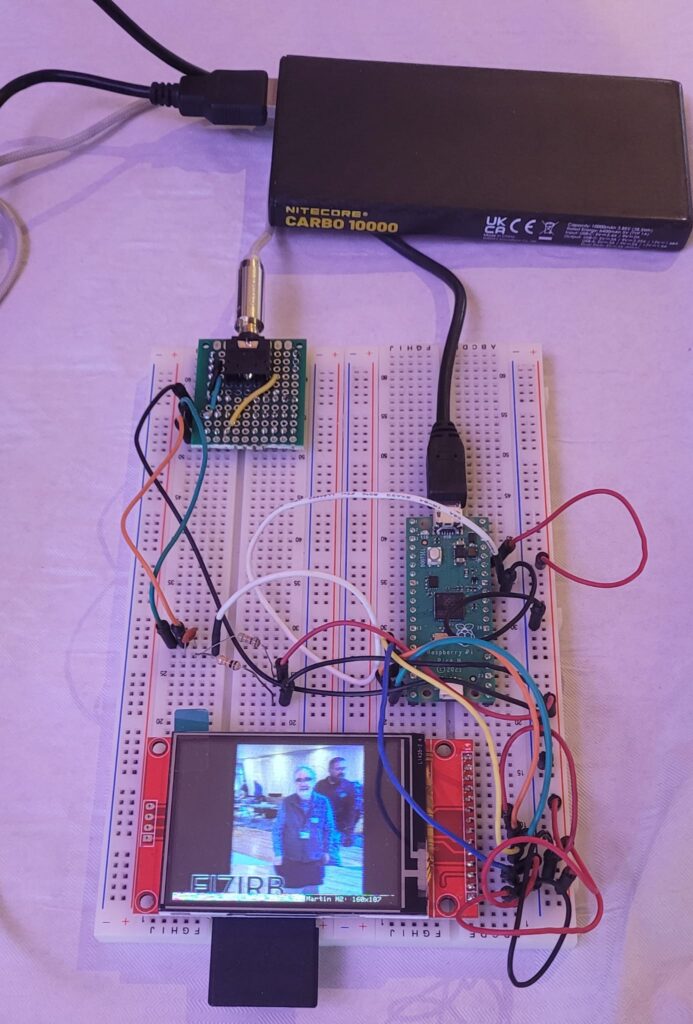
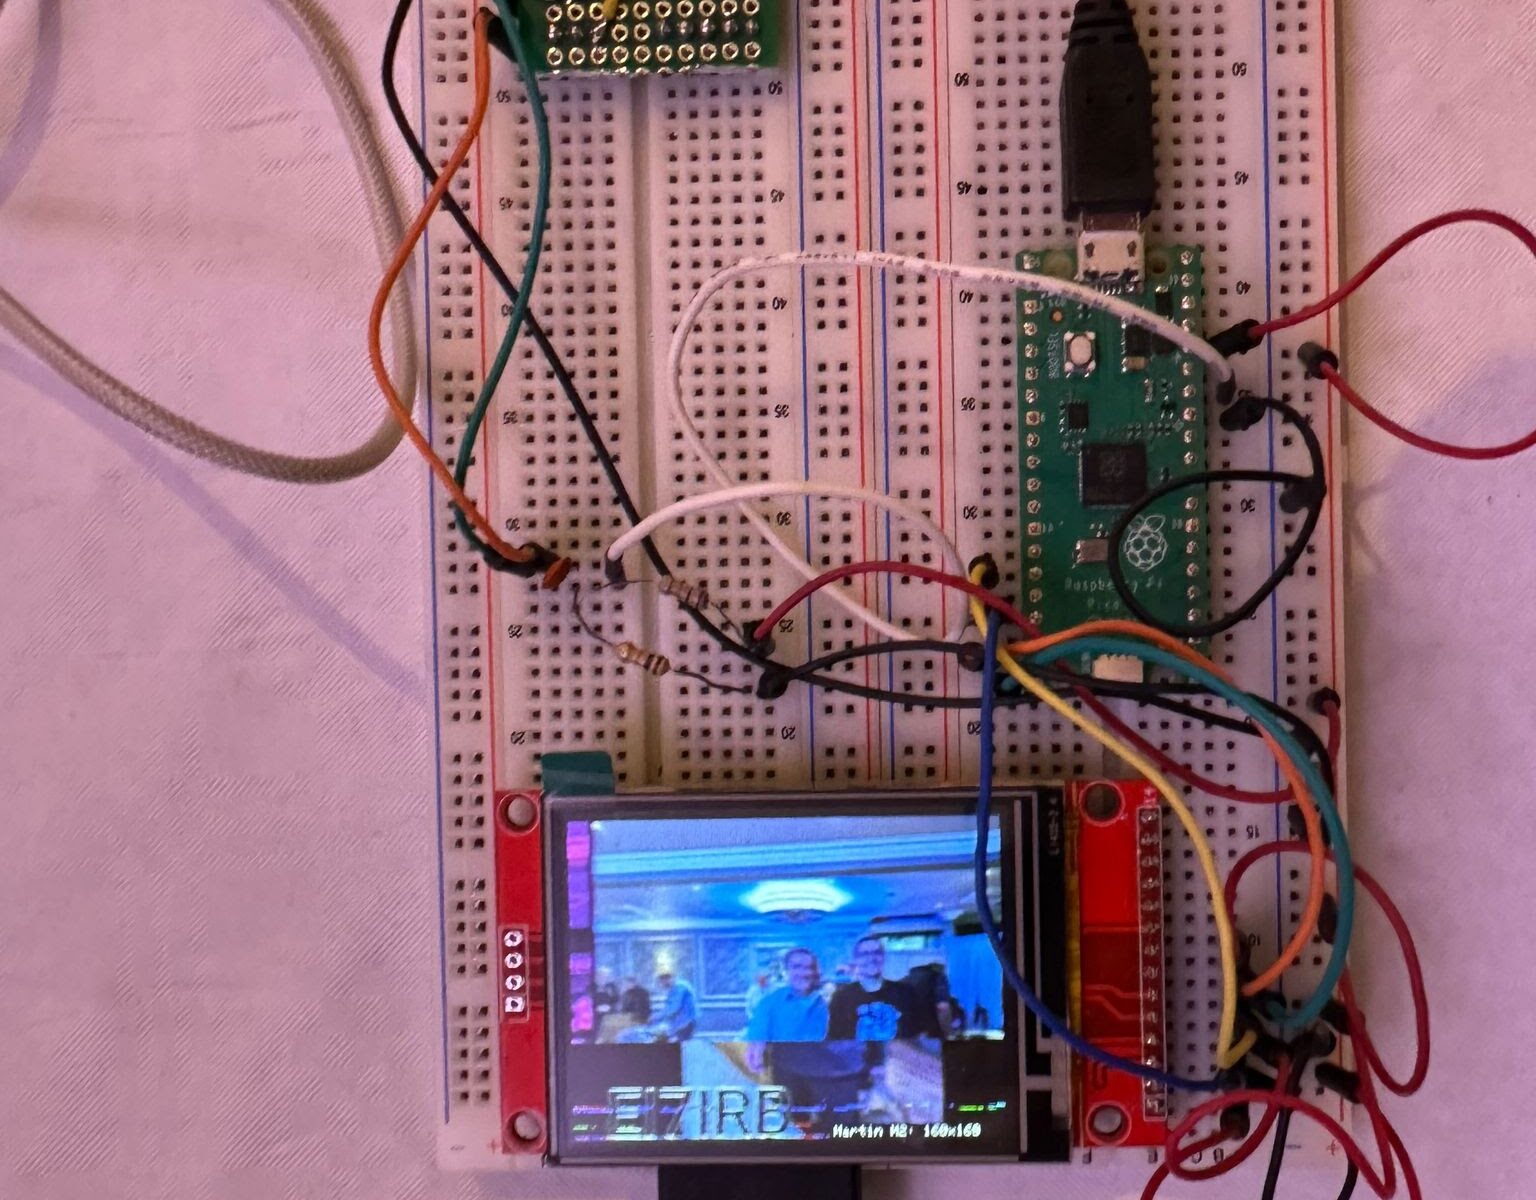
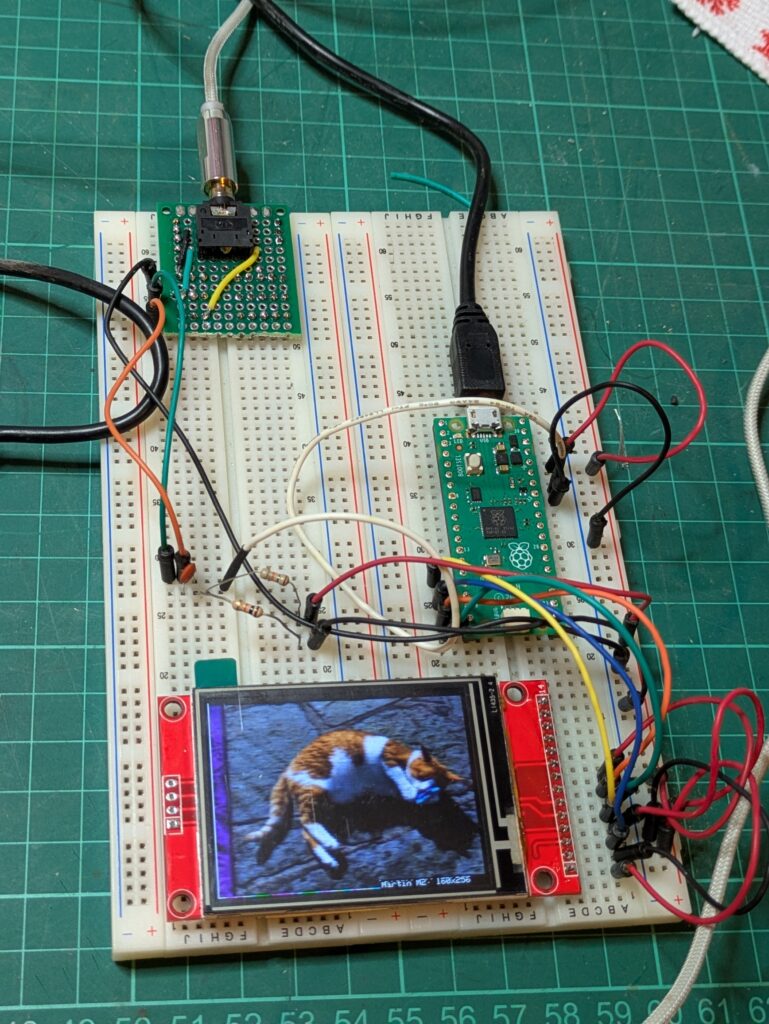
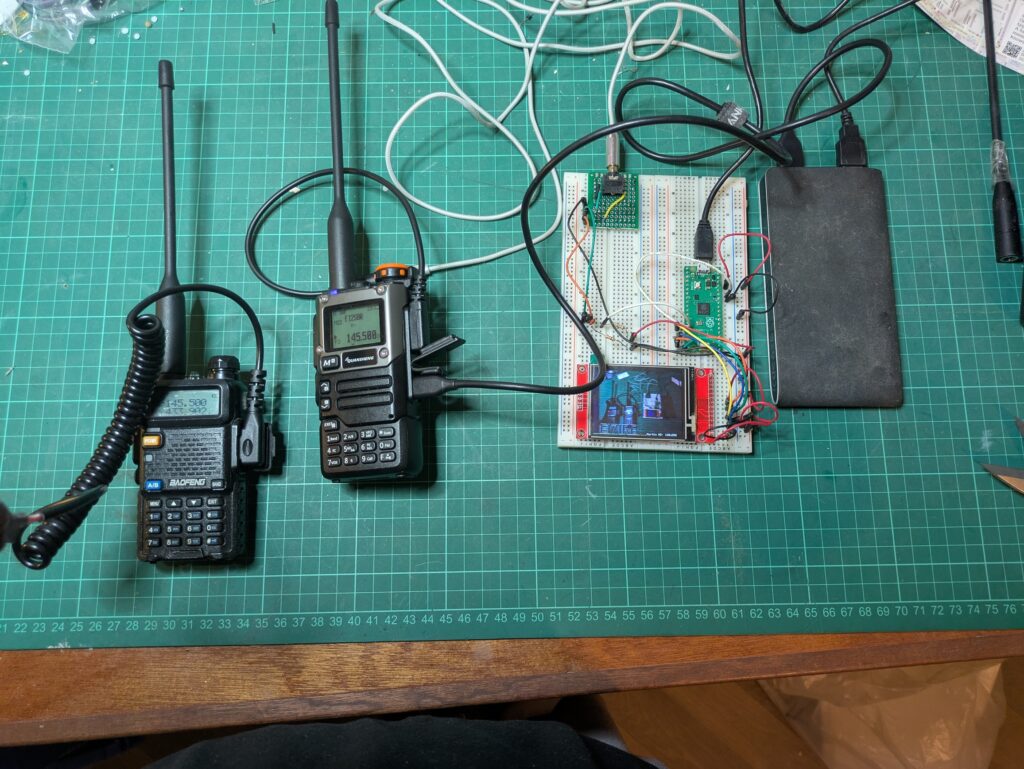
Once the circuit was wired up on the breadboard, the project used the following parts:
| Part | Quantity |
|---|---|
| 320×240 ILI9341 display | 1 |
| Raspberry Pi Pico | 1 |
| 10kΩ resistor | 2 |
| 100nF ceramic capacitor | 1 |
| 3.5mm Stereo Socket | 1 |
With everything connected, it was time to dive into the code. I followed the fantastic SSTV code by Jon Dawson, written for the Raspberry Pi Pico. The setup was straightforward, and before long, I had the system sending out a test image—a cat from @choiceIrregular, naturally—via SSTV.
If you’ve never heard SSTV audio before, it’s… unique. I captured a short video of the transmission. (Fair warning: it’s not exactly soothing—so maybe turn the volume down. Bonus: you can decode the audio from the video too!)
The final step was hooking the system up to a radio for real over-the-air transmission. On the transmission side, I used a USB-C to 3.5 mm adapter connected to my phone (using the SSTV Encoder app), paired with a “Kenwood” 2.5 mm TRS to 3.5 mm TRS connector-to-bare-wires cable. Using a connector block, I had a rough-and-ready USB-to-mic cable.
On the receiver side and another radio, I used another “Kenwood” adapter—this time to a 3.5 mm female socket—and then a simple 3.5 mm audio cable into my device.
And it worked! 🎉
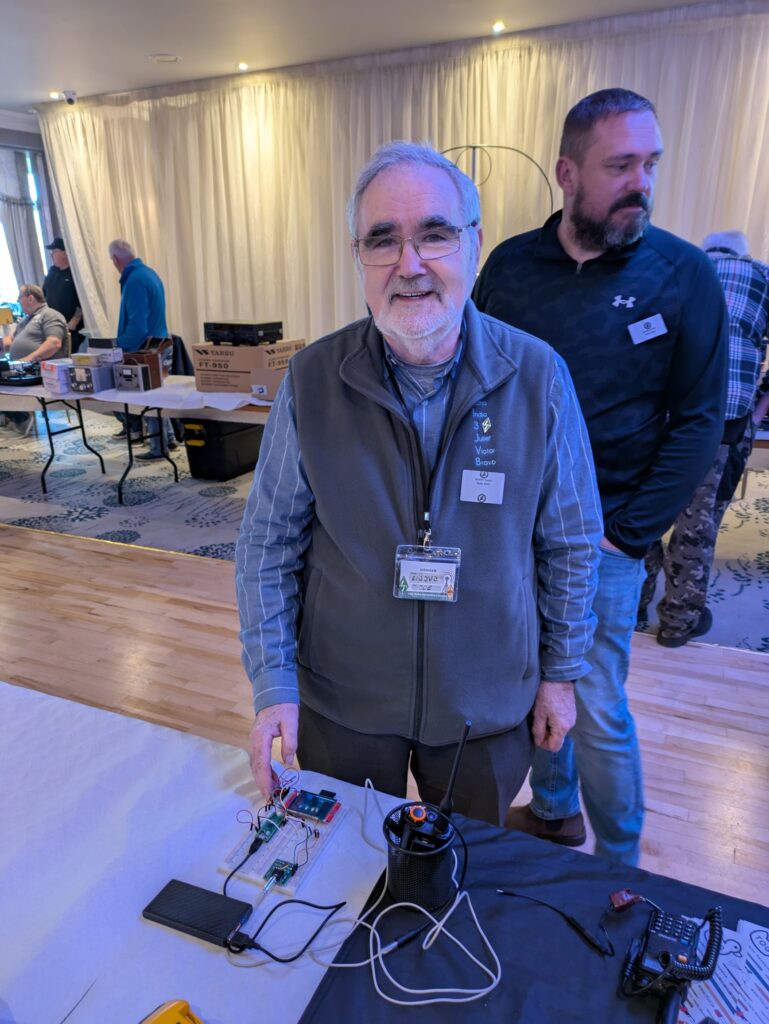
Bonus: The photo below is a selfie of the project itself.
This little project was a great way to showcase digital image transmission using amateur radio, with a modern twist via the Raspberry Pi Pico. It sparked some fun conversations at the rally and hopefully inspired a few fellow hams to try it out themselves.
There’s also lots of scope for improvements. Here are a few ideas:
- Moving it off the breadboard to make it more robust for events
- Adding shielding—if I transmit too close, the screen goes white (I suspect interference on the SPI bus)
- Saving received images—the screen has an SD card slot
- Automating the sending side—currently, I have to hold the PTT button manually
If you’re curious about trying this out, I highly recommend checking out Jon Dawson’s guide, the inventor of the project:
👉 https://101-things.readthedocs.io/en/latest/sstv_decoder.html
73s!
— Jeffrey Roe, EI7IRB
📸 Photos from the IRTS AGM Weekend & Radio Rally
Joe (EI3JVB), before and after his image was sent via SSTV. Check out our gallery for more!